-
More Resources
-
Updates & Announcements
-
340B Architect
-
340B Impact
-
340B RxCorrelate
-
340B Monitor
-
340B Written Location
-
340B Central Split
-
All About Architect Webinar Series
-
More Resources
-
Right Side Callout
-
Recent Manufacturer Notices
-
More Videos
Overview
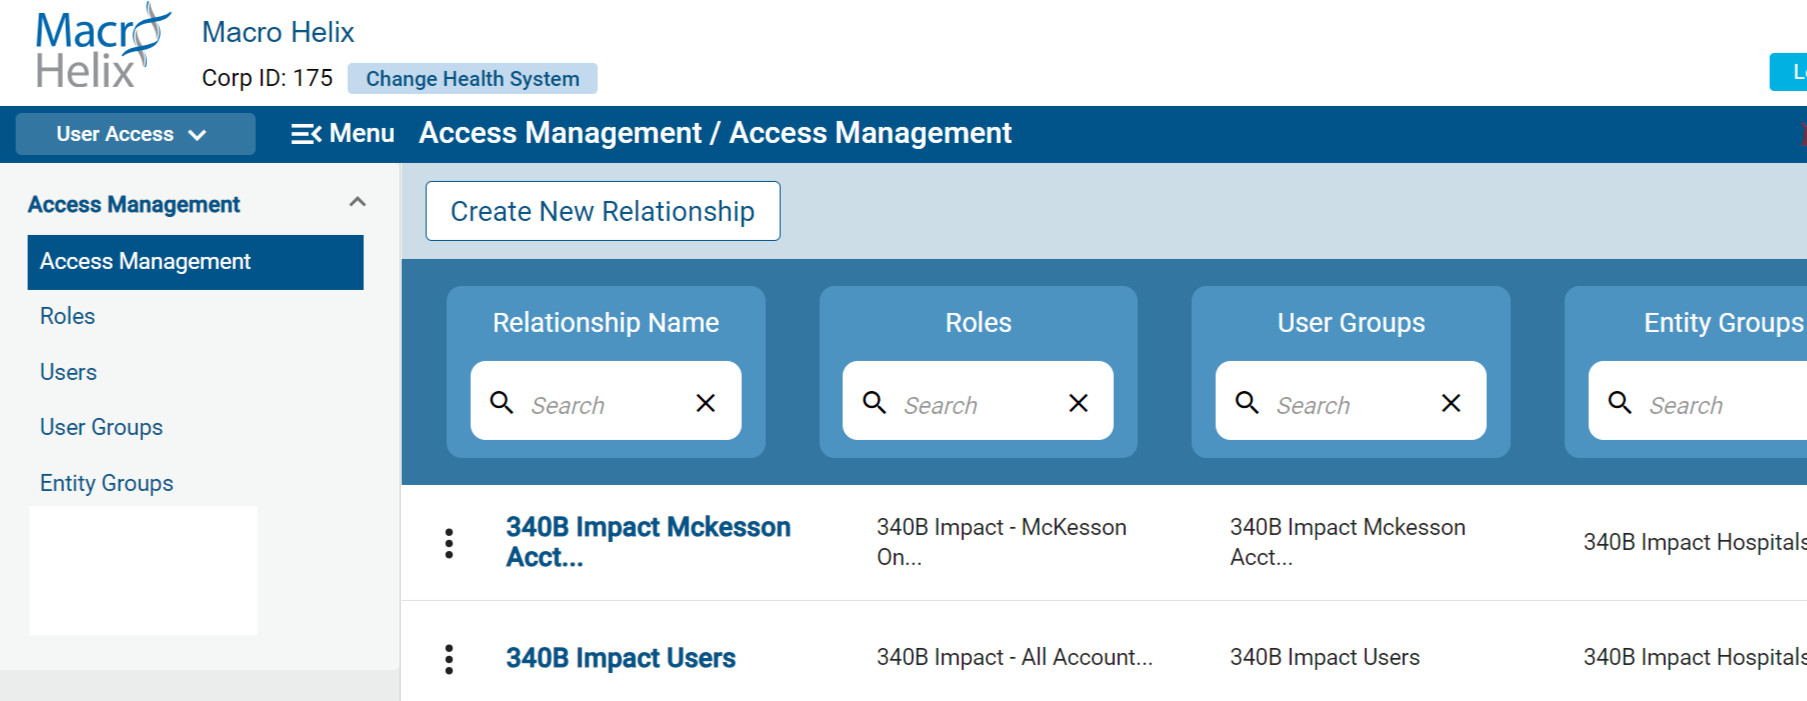
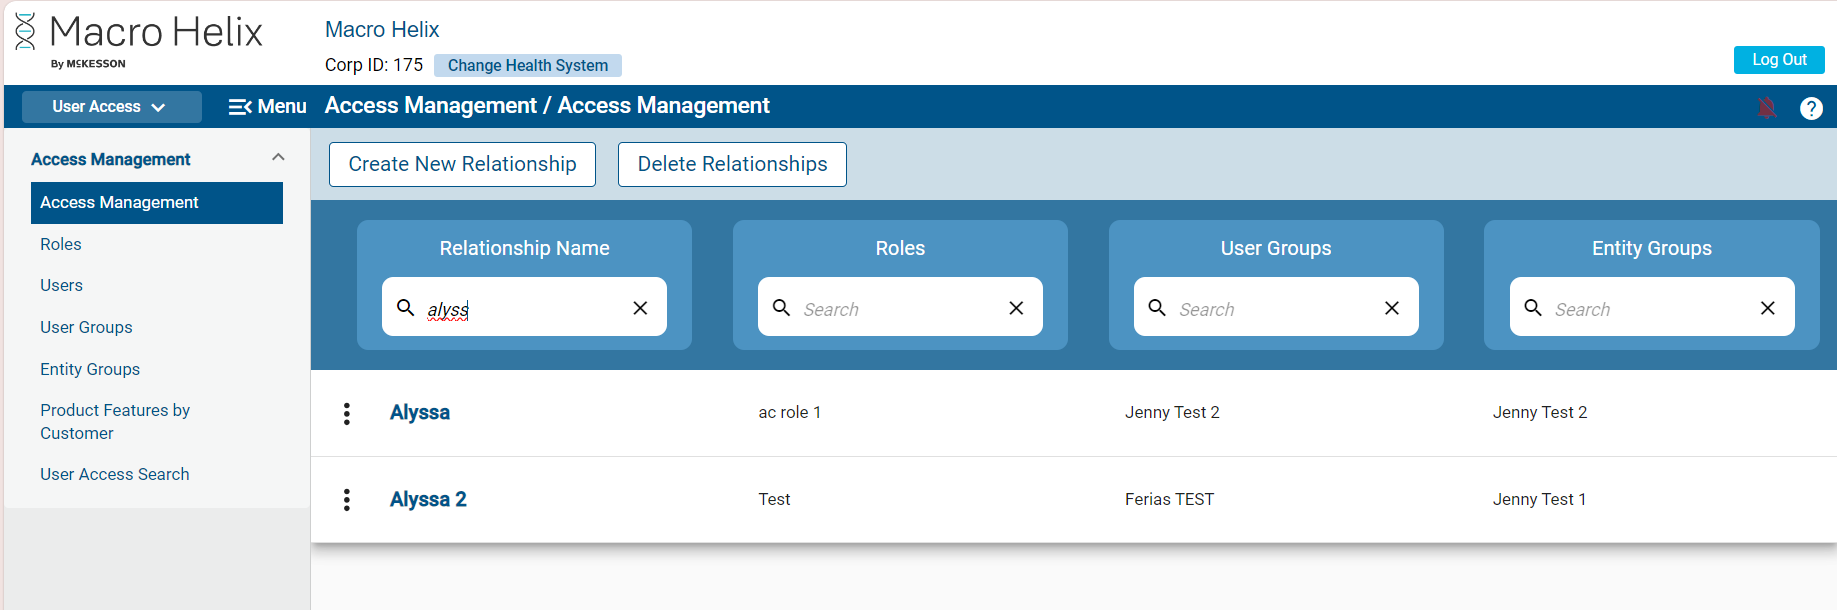
The Access Management page in User Access allows you to create and manage Relationships and search for specific user access details for your Corporate ID.
From this page, you can:
- View, edit, create, and delete Relationships
- See all users who have access to a pharmacy or hospital
- Search for a user's access to a pharmacy
- Find which users have a specific permission
- Check if a user has permission within a pharmacy or hospital
FAQ: Why do I see duplicates in my Access Management table?
When Macro Helix carried current permissions over to the new User Access module, some health systems had a large number of Relationships. Each line in the table represents one of these unique Relationships, meaning they may be linked to different Roles or Entity Groups.
You can clean up this list by deleting any unnecessary Relationships, making the table easier to view. In Phase 2 of User Access, you will be able to delete Relationships in bulk via this page.
What is a Relationship? A relationship is a unique combination of Roles, User Groups, and Entity Groups. Within a relationship, a specific set of permissions (Roles) is assigned to a group of users (User Group) who have access to certain HIDs and PIDs (Entity Group).
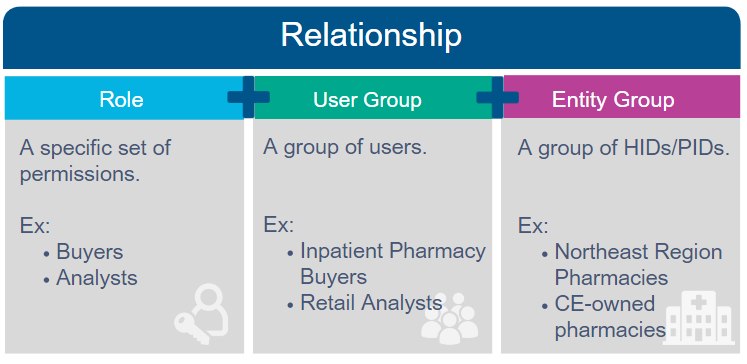
The Access Management page is where the Roles, User Groups, and Entity Groups come together. After creating unique sets of permissions and User/Entity Groups on the other pages within User Access, you can combine these to make a Relationship. For example, the same Role can be in a relationship with multiple User Groups or Entity Groups.
Access Management Best Practices
You can create relationship "tiers" by varying the Roles. For example, you can create two relationships with the same User Group and Entity Group, but one has access to more Roles.
- Create Roles with unique permissions.
- You can create relationship "tiers" by varying the Roles. For example, you can create two relationships with the same User Group and Entity Group, but one has access to more Roles.
Filtering:
You can use the search feature below each header name to filter the following elements individually or by combining elements. For example, you could type a user name into the User Groups search bar and a role name into the Roles search bar to find a specific relationship.
-
Relationship Name:
- Relationship Name
-
Roles:
- Role Name
- Page/Permission Name
-
User Groups:
- User Group Name
- User Name
-
Entity Groups:
- Entity Group Name
- Hospital Name
- HID
- Pharmacy Name
- PID
- Chain Name
- Chain Group ID
The search will filter the results in all columns.
-
Examples:
- If you search by Email ID, the entire relationship row will display matching the Email ID.
- If you search by HID, the relationship rows having HID in the entity groups will be filtered.
Editing Relationship Details
To the left of each Relationship row, you can click the ellipsis and then View Details/Edit. The Save button will be enabled once changes have been made. Clicking Cancel returns you to the Access Management homepage.
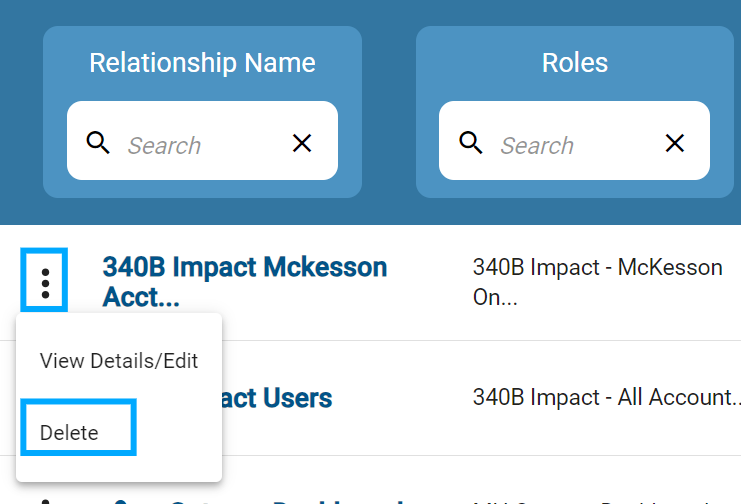
Deleting Relationships
To the left of each relationship row, you can click the ellipsis and then Delete.
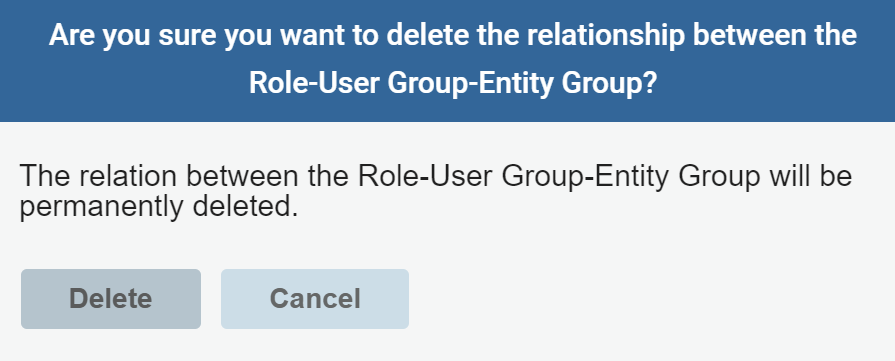
Click Delete in the popup warning message to permanently remove the Relationship.
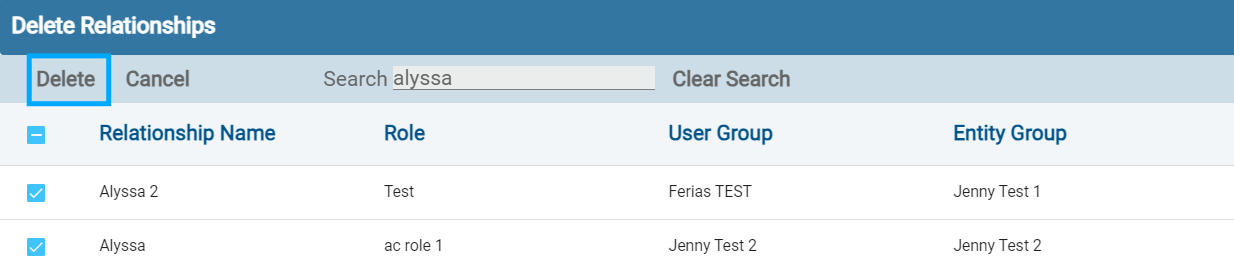
Deleting Relationships in Bulk
1. Click the Delete Relationships button at the top of the Access Management page.
2. From the popup, select the desired Relationships and then click Delete.
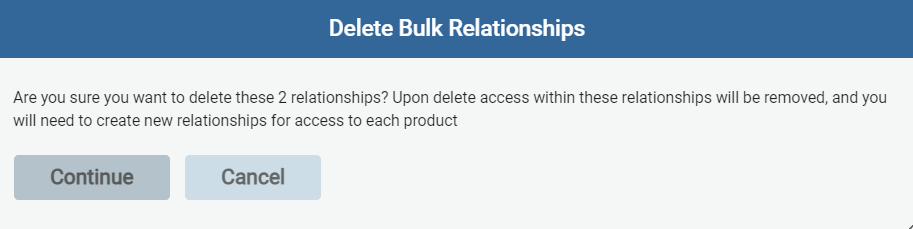
3. A message will appear alerting you that if you delete relationships, you cannot undo this action. Click Continue.
Creating New Relationships
Click Create New Relationship at the top of the Access Management page.
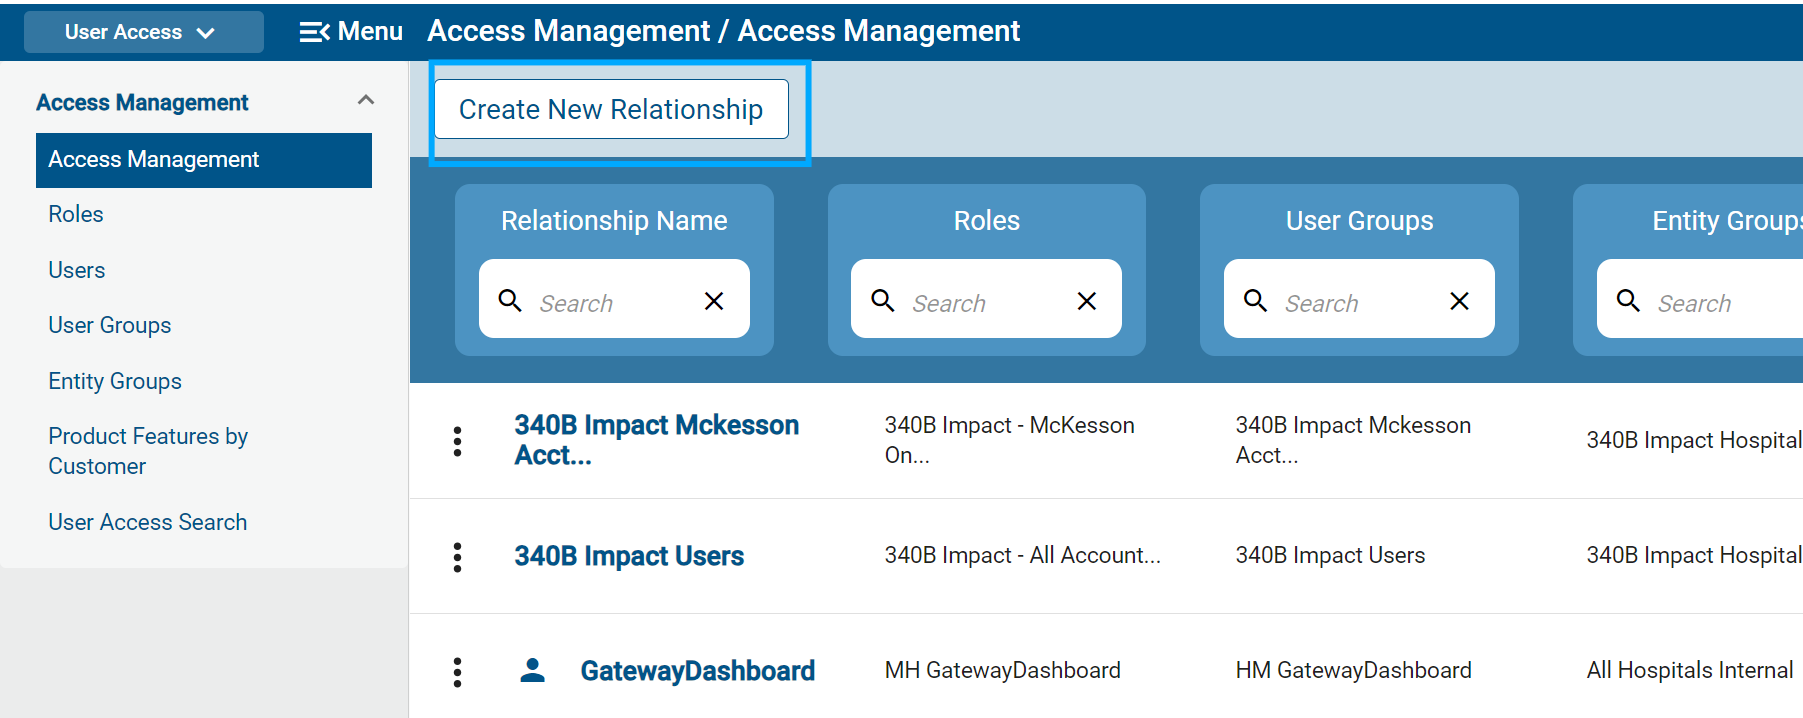
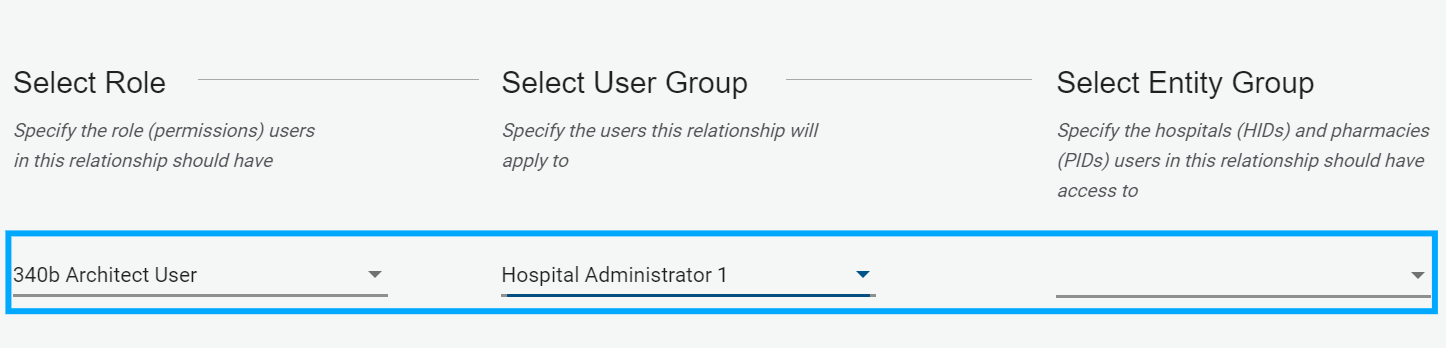
The Create New Relationship popup will appear. Add a relationship name and description and select from the dropdowns for the three following categories:
- Roles: What permissions they have
- Only one Role can be selected
- User Group: Which users can do it
- Only one User Group can be selected
- Entity Group: To which HIDs/PIDs
- Only one Entity Group can be selected
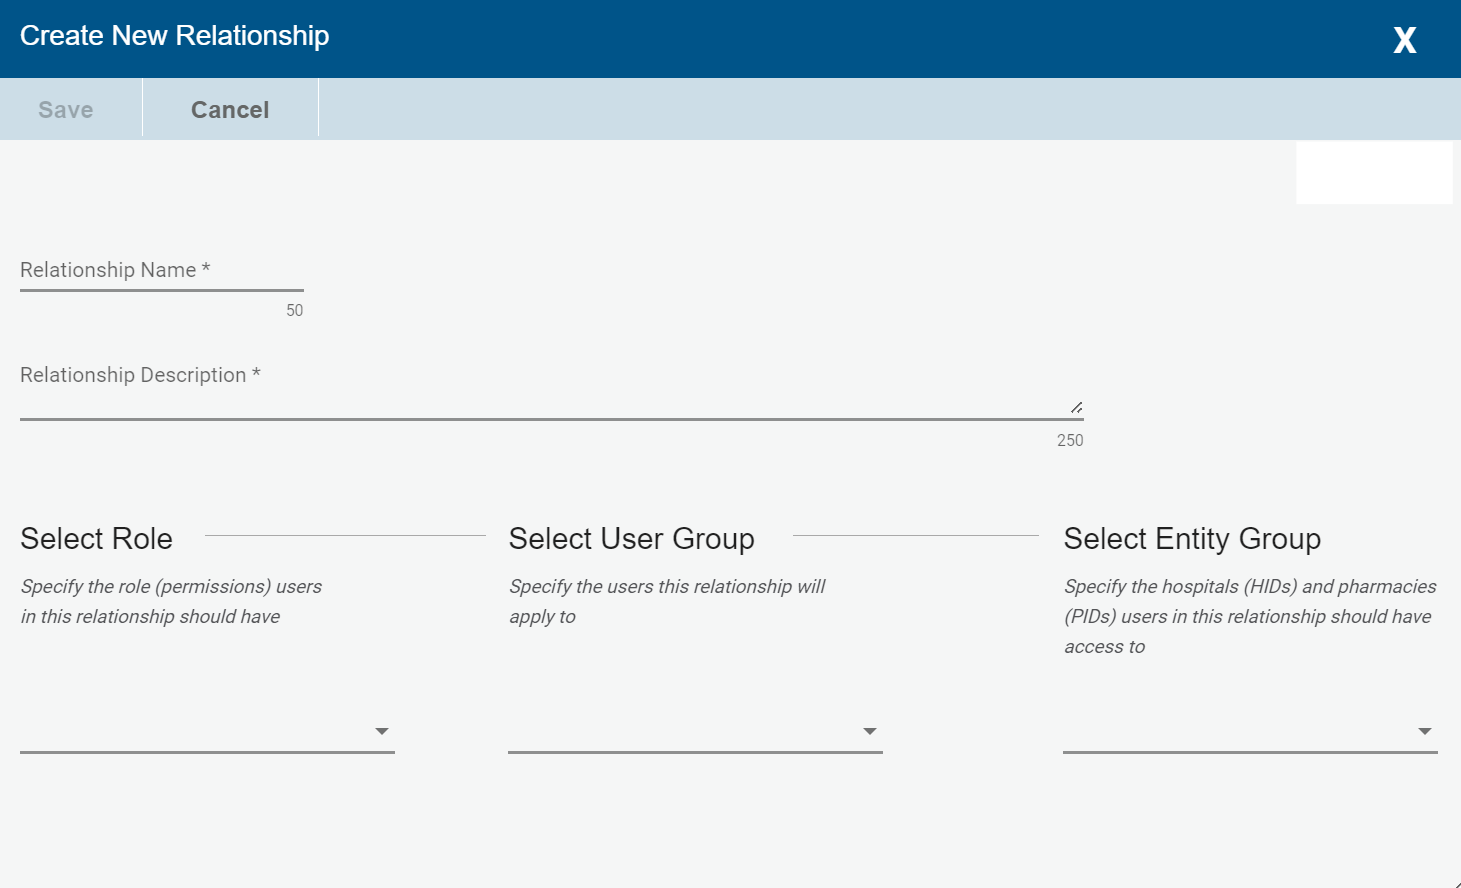
Duplicate relationships cannot be created.
After making the desired selections, click Save. You will return to the Access Management page where you will see the new Relationship Name in the left column. If you select Cancel, you will return to the Access Management page and no new Relationship will be added.
 User Groups Page